Adding an energy meter to an existing solar system sounds simple: install a meter, connect it to an app, and start reading import, export, and household load. In practice, the result depends much more on where the meter is installed, which system needs to use the data, and what decision the data is meant to support.
The short version: before adding a meter, confirm the measurement boundary, inverter compatibility, supply type, CT orientation, data access path, and dashboard assumptions. A good meter in the wrong place can create a polished but misleading energy dashboard. A modest meter in the right place can make solar self-consumption, export, battery behavior, and large-load planning much clearer.
This guide is written for homeowners, installers, energy consultants, and technically confident buyers who already have a working solar system and want better monitoring without rebuilding the whole setup.
Start with the problem you are trying to solve
Do not start by asking which meter is best. Start by asking which missing number is causing the problem.
Common reasons to add a meter include:
- the inverter app shows solar production but not household consumption;
- the utility bill is higher than expected even when solar generation looks healthy;
- the owner wants to see grid import and export in real time;
- a battery quote depends on evening import and daytime export data;
- an EV charger, heat pump, hot water system, or pool pump needs separate visibility;
- Home Assistant, Node-RED, Grafana, IAMMETER Local, or another dashboard needs local energy data;
- an inverter requires a supported meter for export limiting, self-consumption control, or battery operation.
Those are different jobs. A meter chosen for dashboard visibility may not be accepted by an inverter for control. A meter that works well for a single circuit may not explain whole-home self-consumption. A formal DIN-rail Modbus meter may be excellent hardware but still useless to the homeowner if nobody has planned the gateway or dashboard.
Define the measurement boundary first
The most important question is: what exactly will the meter measure?
For solar monitoring, the usual boundaries are:
| Boundary | What it tells you | When it matters |
|---|---|---|
| Grid connection | Import from the grid and export to the grid | Almost every solar monitoring setup |
| Solar inverter output | Actual AC production from the solar system | Verifying generation and comparing with inverter data |
| Whole-home load | Total household consumption behind the meter | Understanding bills and self-consumption |
| Battery circuit or battery data | Charge and discharge behavior | Battery sizing, tariff operation, backup behavior |
| EV charger or large load | A specific controllable load | Solar charging, load management, cost allocation |
In many homes, the first priority is the grid connection. If you can measure import and export accurately, then combine it with solar production, the dashboard can usually calculate household load and self-consumption. Without that boundary, the system may guess.
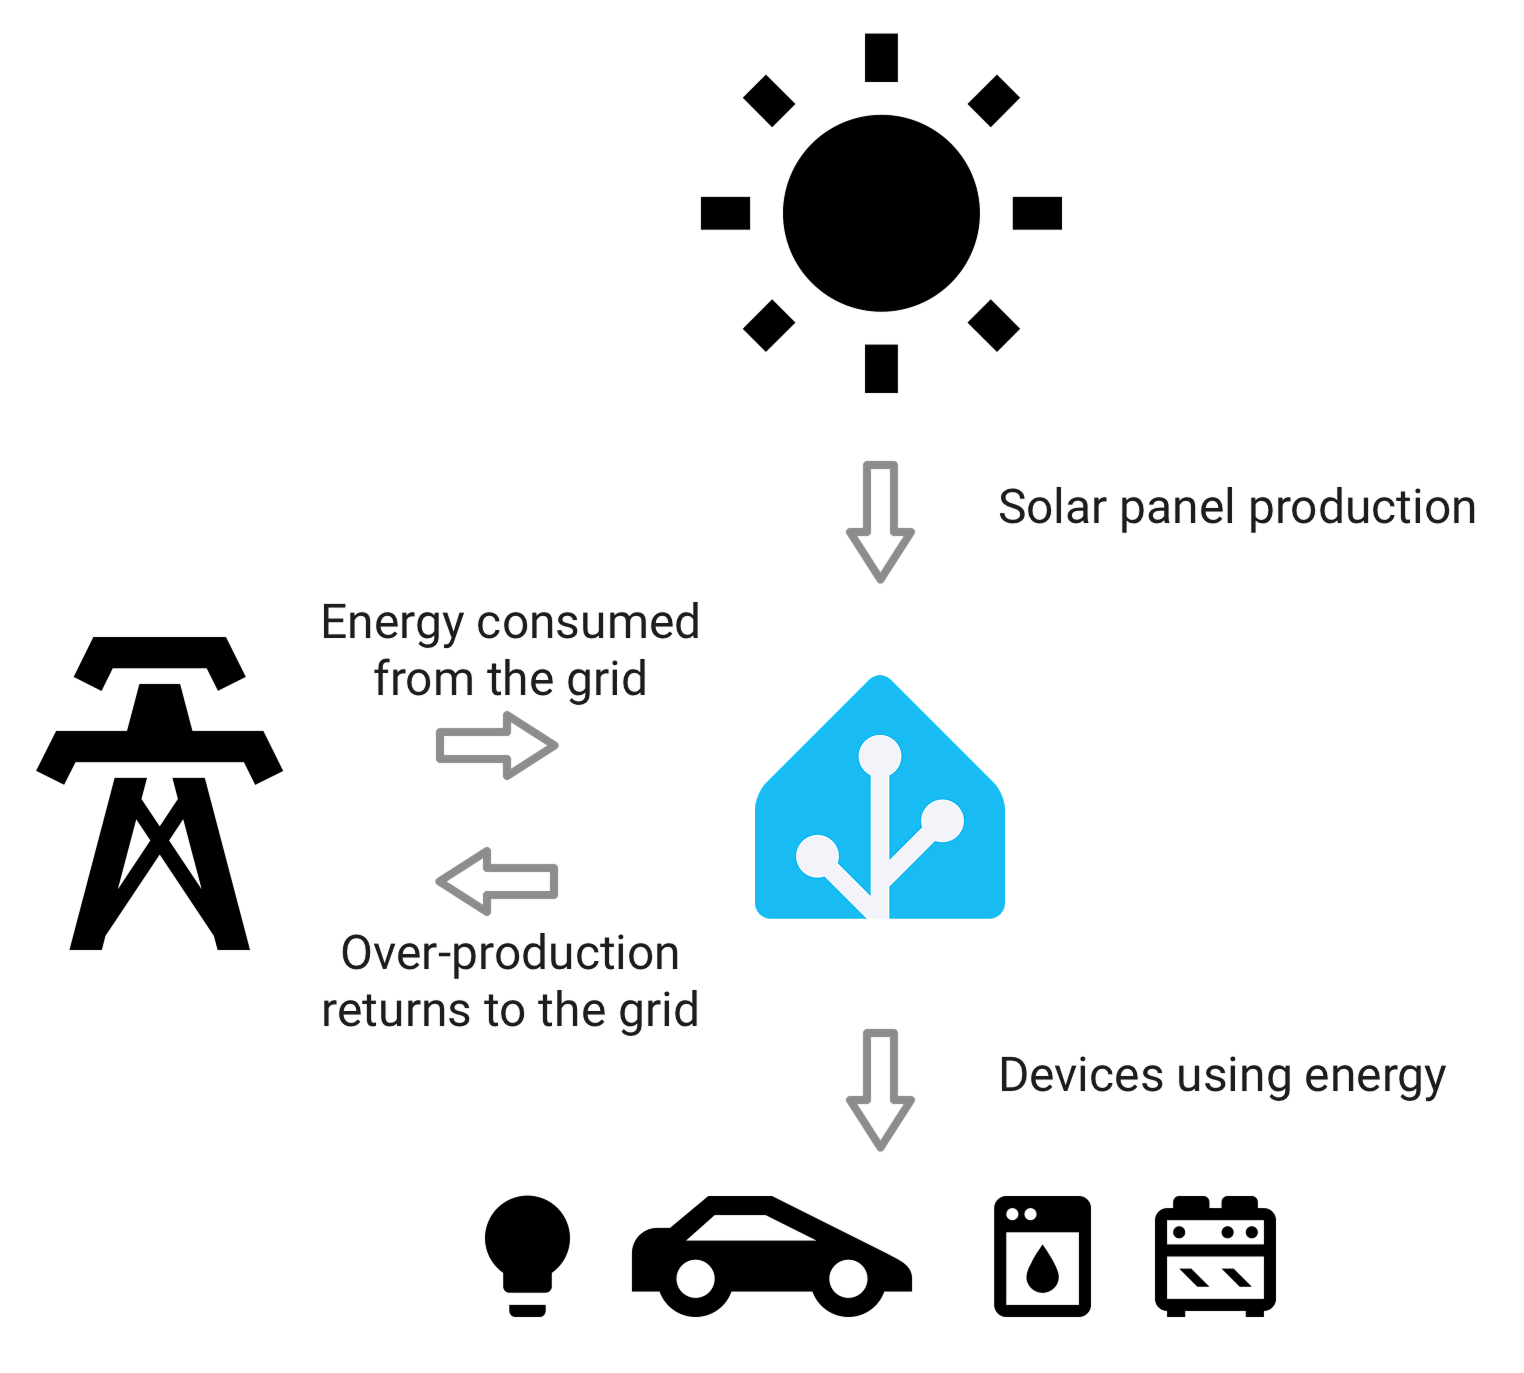
Dashboards only work when the underlying measurement boundaries are clear. Grid import/export, solar production, and household load should not be mixed casually.
Check whether the inverter needs a specific meter
If the meter is only for independent monitoring, you have more freedom. If it will be used by the inverter, battery, EV charger, or export-control system, compatibility matters much more.
Many inverter ecosystems expect a supported meter model, communication protocol, wiring arrangement, or register map. This is especially common when the meter is used for:
- export limiting;
- zero-export control;
- battery charge and discharge decisions;
- self-consumption optimization;
- hybrid inverter operation;
- vendor cloud dashboards;
- warranty or installer support workflows.
A third-party Wi-Fi meter may show import/export perfectly in Home Assistant, but that does not mean the inverter can use it for closed-loop control. Conversely, a vendor-approved Modbus meter may work beautifully with the inverter but offer limited user-facing data access outside that ecosystem.
Before buying hardware, check:
- the inverter brand and exact model;
- whether the inverter already has a meter or CT kit installed;
- the official compatible-meter list;
- whether the meter is required for monitoring only or control as well;
- whether the installer will support a third-party meter;
- whether firmware, region, or export-control settings affect compatibility.
If the inverter requires a specific meter for control, follow that requirement first. You can still add an independent meter later if the user-facing data is not good enough.
Confirm supply type and phase behavior
Solar homes may be single-phase, split-phase, or three-phase depending on the country and service. The meter must match the electrical reality of the site.
For a simple single-phase home, one bidirectional meter or one CT pair may be enough. For a three-phase home, you need to know whether the solar inverter is single-phase or three-phase, how loads are distributed, and whether the dashboard should show per-phase values or only totals.
Three-phase data can be confusing when:
- CT clamps are installed on the wrong phase;
- voltage reference and current channel do not match;
- one phase imports while another exports;
- the dashboard sums power in a way that hides phase imbalance;
- the inverter app and external meter use different definitions of net import/export.
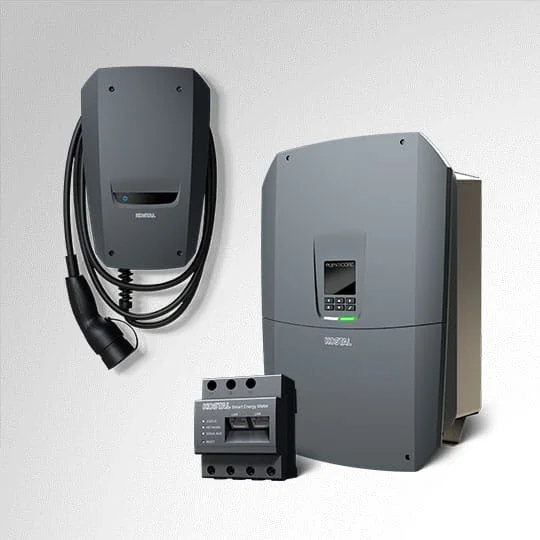
For three-phase sites, prioritize meters that make phase mapping clear and serviceable. DIN-rail meters such as Eastron SDM630, Chint DTSU666, KOSTAL Smart Energy Meter G2, and IAMMETER WEM3080T fit different ecosystems and installation styles, but the common requirement is the same: voltage, current, and phase assignment must line up.
Plan CT placement before the electrician arrives
CT-based meters are popular because they can often be installed without routing all current through the meter body. But CT placement is also one of the easiest ways to get wrong data.
Before installation, sketch the panel and decide:
- which conductor is the grid feed;
- which conductor is the solar inverter output;
- whether battery or backup circuits change the normal flow;
- whether CT arrows should point toward the load or toward the grid according to the meter documentation;
- whether neutral placement or split conductors affect the reading;
- whether the CT rating matches the circuit current;
- whether the CT physically fits around the conductor;
- whether the CT lead length and routing are safe and tidy.
A reversed CT may produce negative values. A CT on the wrong conductor may make solar look like load or load look like export. A CT around both active and neutral may read close to zero. These errors are common because the numbers can still look plausible at first glance.
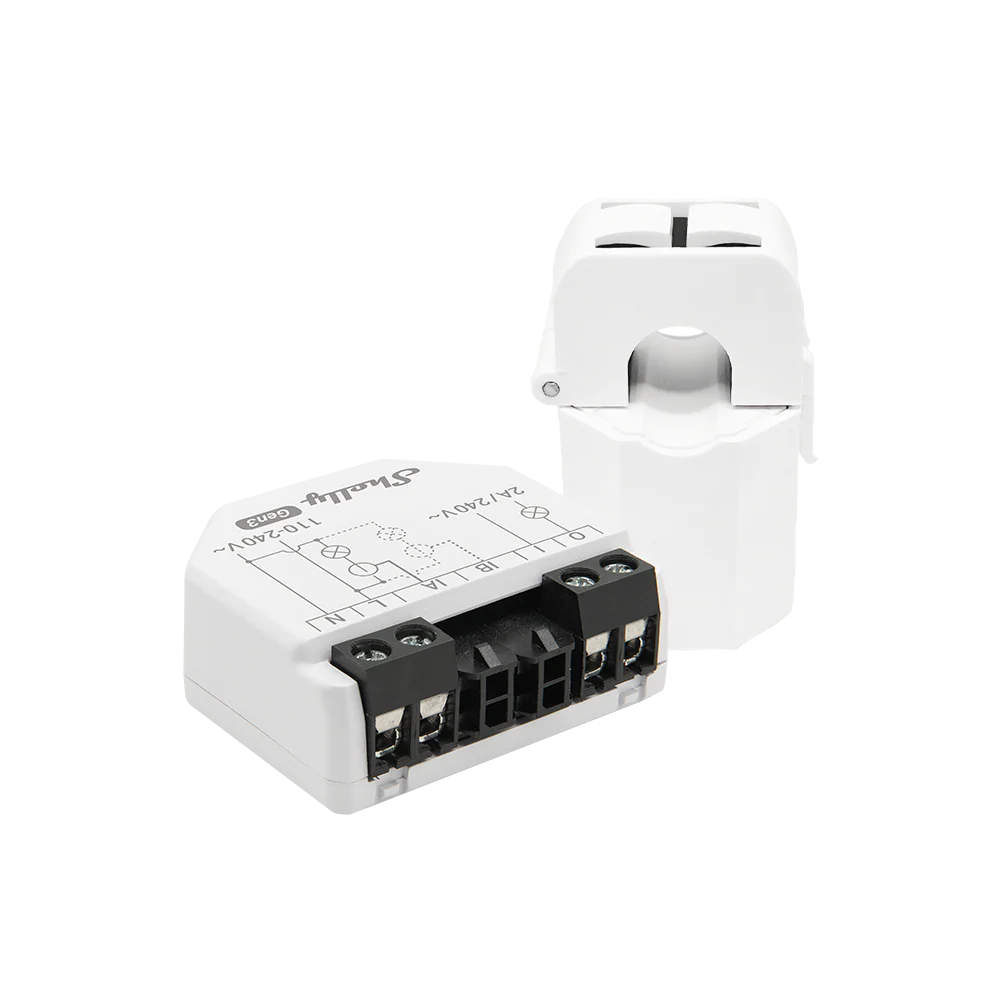
Compact CT meters are useful for retrofits and targeted monitoring, but CT direction, conductor choice, and channel labeling decide whether the data is trustworthy.
Decide whether you need visibility, control, or both
A meter used for visibility can be relatively independent. It only needs to report data clearly enough for the dashboard or user. A meter used for control has a higher bar because another system will act on its readings.
Visibility examples:
- show import/export in a dashboard;
- estimate self-consumption;
- compare electricity plans;
- identify whether a battery might pay off;
- track a heat pump or EV charger separately.
Control examples:
- limit solar export;
- shift EV charging based on surplus solar;
- throttle a charger to avoid overloading the main supply;
- trigger a hot water relay;
- coordinate battery charging with tariffs;
- disconnect or reduce flexible loads during high demand.
For control, check latency, reliability, supported integrations, fail-safe behavior, and local electrical rules. A dashboard that updates every minute may be fine for human review, but not suitable for fast load management. A cloud-only path may be convenient, but it may not be the right dependency for real-time control.
Choose the data path before choosing the dashboard
A meter is only useful if its data can reach the place where decisions happen.
Common data paths include:
| Data path | Good fit | Watch out for |
|---|---|---|
| Vendor cloud app | Simple remote monitoring and installer support | Cloud dependency, export limits, account access |
| Local web/API over Wi-Fi or Ethernet | Home dashboards and local automation | Network reliability and API documentation |
| MQTT | Flexible automation and event-driven systems | Broker setup, topic structure, retained values |
| Modbus RTU/TCP | Installer-grade meters, inverters, gateways | Wiring, register maps, polling setup |
| Inverter accessory bus | Vendor control and monitoring | Limited third-party access |
Home Assistant users should check whether the meter produces clean power and energy entities. Energy dashboards usually need cumulative energy readings in kWh, not only live power in watts. For solar homes, separate import and export energy sensors are often cleaner than one net value.
If you plan to use IAMMETER Cloud, IAMMETER Local, SolarAssistant, Node-RED, Grafana + InfluxDB, or an EnergyMeterHub gateway project later, check that the meter exposes the right data before installation. Retrofitting data access after buying a closed app-only device is often harder than choosing a more open path at the start.
Think about batteries and EV chargers before they arrive
Even if the current solar system has no battery or EV charger, the meter choice can affect future upgrade options.
Ask these questions now:
- Will a future battery need a vendor-approved meter?
- Will backup circuits change where whole-home load should be measured?
- Will an EV charger need dynamic load management?
- Will surplus-solar charging require live export data?
- Will a heat pump or hot water system need separate metering?
- Will a three-phase upgrade make the current meter too limited?
The point is not to buy every sensor today. The point is to avoid blocking future decisions. A simple but well-placed grid meter can remain useful for years. A poorly placed meter may become irrelevant as soon as storage or EV charging is added.
Do not forget gateways and protocol bridges
Some existing solar systems already have a good meter, but the data is trapped in RS485, an inverter bus, or a local network that the homeowner cannot easily use. In that case, a gateway may be more useful than another meter.
A gateway can help when:
- a Modbus meter is already installed correctly;
- the meter data needs to reach Ethernet, MQTT, Home Assistant, or a custom dashboard;
- several meters share an RS485 bus;
- a local data logger is preferred over cloud-only reporting;
- the project needs a stable bridge between old electrical hardware and newer software.
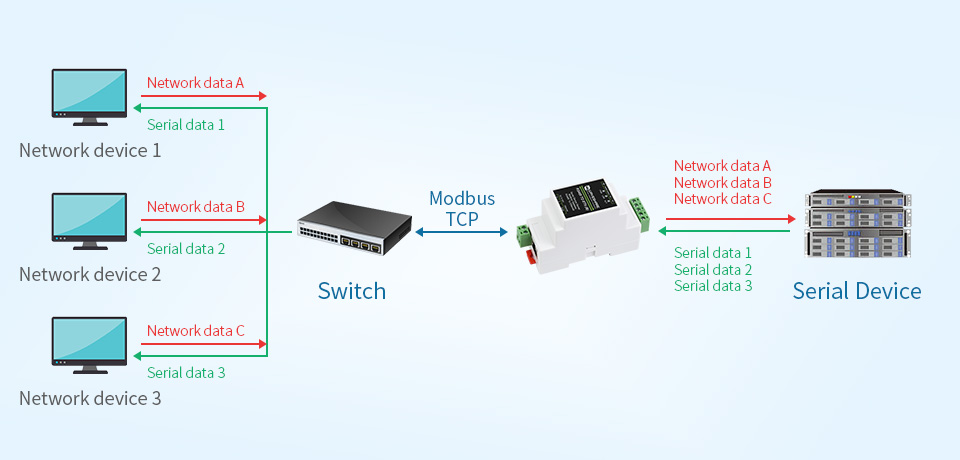
A gateway can be the missing piece when the meter is already good but the data path is not usable enough for dashboards or automation.
Gateways need documentation. Record baud rate, parity, meter address, register map, IP address, polling interval, and which system is allowed to write settings. Otherwise a working setup can become difficult to maintain later.
Installation checks before work starts
Before the electrician or installer begins, collect these details:
| Check | Why it matters |
|---|---|
| Inverter make and model | Determines whether a supported meter is required |
| Existing meter or CT kit | Avoids duplicate hardware and conflicting readings |
| Supply type | Single-phase, split-phase, and three-phase systems need different approaches |
| Target measurement point | Prevents installing the meter on the wrong side of the inverter or load |
| CT rating and fit | Avoids unsafe or inaccurate current measurement |
| Communication path | Confirms Wi-Fi, Ethernet, RS485, or cloud access will actually work |
| Dashboard requirements | Ensures import/export, kWh totals, and cost data can be represented correctly |
| Future upgrades | Leaves room for battery, EV charger, tariff automation, or load management |
| Safety and compliance | Keeps panel work within local electrical rules |
If any of these are unknown, pause the purchase. A short pre-installation survey is cheaper than moving CTs or replacing a meter later.
Post-installation validation
After the meter is installed, do not assume the first dashboard is correct. Validate it with simple real-world tests.
Useful checks include:
- Turn on a known large load and confirm live power rises in the expected direction.
- Watch a sunny period and confirm export appears when household load is lower than solar production.
- Confirm nighttime solar production is zero and grid import still behaves normally.
- Compare daily import/export totals against the utility meter or bill where available.
- Check that cumulative energy values increase correctly and do not reset unexpectedly.
- Confirm per-phase readings make sense on three-phase systems.
- Label every CT, channel, entity, and dashboard sensor in plain language.
If the dashboard shows impossible values, do not immediately blame the app. Check CT direction, phase mapping, voltage reference, sign convention, duplicated sensors, and whether the system is mixing instantaneous power with cumulative energy.
When adding a separate meter is worth it
A separate energy meter is worth adding when it answers a question the existing solar app cannot answer reliably.
It is usually worth considering when:
- the inverter app does not show live grid import/export;
- the home exports a lot of solar but still imports heavily at night;
- a battery or EV charger decision depends on real load shape;
- Home Assistant or another local platform is part of the plan;
- the existing vendor dashboard is too slow, too closed, or too hard to export;
- a specific large load needs its own measured data.
It may not be worth it when:
- the existing inverter meter already provides accurate import/export and usable data;
- the goal is only a rough monthly bill estimate;
- there is no safe or practical installation point;
- the chosen meter cannot communicate with the platform that needs the data;
- the user expects appliance disaggregation from a single main meter.
Practical recommendation
Before adding an energy meter to an existing solar system, treat the task as a measurement-design problem, not a shopping problem. Define the boundary first, then check inverter compatibility, phase support, CT placement, data access, and future upgrade needs.
For many homes, the best first meter is the one that gives reliable grid import/export and can feed a dashboard or control system without locking the owner into a dead-end app. For more complex solar, battery, EV, or three-phase systems, the safer answer is often a supported meter plus a documented data path.
The goal is not more numbers. The goal is trustworthy energy flow data that helps the owner make better decisions about self-consumption, tariffs, storage, EV charging, and future monitoring upgrades.
Related EnergyMeterHub pages
- What a Good Solar Home Monitoring Setup Should Include Beyond the Inverter App
- How to Plan a Home Energy Monitoring Setup That You Will Not Outgrow in a Year
- When a Wi-Fi Energy Meter Makes More Sense Than a Traditional DIN-Rail Meter
- IAMMETER WEM3080 vs Shelly EM: Which Is Better for Solar Homes?
- Home Assistant Energy Dashboard: Complete Setup Guide for Smart Meters
Sources
- Home Assistant energy management documentation
- IAMMETER home solar monitoring solution
- IAMMETER WEM3080 monitoring quick-start
- Shelly EM Gen3 Knowledge Base documentation
- KOSTAL Smart Energy Meter official product page
- Eastron Europe SDM630 Modbus product page
- Modbus Organization protocol specifications